Rifts
Rifts
Rifts are endgame zones which drop the strongest equipment, as well as unique crafting materials, great runes and certain unique charms.
They are also a great source of experience.

DIFFICULTY: EASY
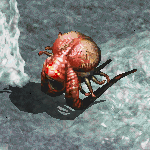
Island of the Sunless Sea
REQUIRED LEVEL: 105
DIFFICULTY: VERY EASY
Location
Act 2: Treasure Vault (Stony Tomb)
Drop Bias
Increased chance to drop gold.
Lore
Gheed's mentor, a travelling merchant, one day found refuge from a storm in an uncanny coastal cavern on the southern edge of the Frozen Sea.
The briny lair's depths emanated an unnatural cold glow under wich a carpet of gold coins was scintillating. Realizing it to be an abandoned pirates' den, he took as much gold as he could carry and ran away.
The bizarre recess was forged by the Inarius' divine might to be once used, as provisional hideout, by his Inquisitors facing the Triune's forces.
After the Sin War, a host of worshippers dwelt into the holy grotto to stand vigil. However, pure heavenly magic proved too powerful for mortals to tolerate for long.
Their minds plunged into delirium while the bodies, perpetually exposed to the everlasting glare, turned diaphanous.
With shattered psyches, and appetite only for the flesh of daring travelers, the zealots' sacrilegious progeny carried on, compelled to stay.
The greedy merchant kept returning to fill his pockets, but was never too bold to step further towards the ghastly light. Until one day, him too, started to feel different...
Strategy
Feyrs will slowly drift towards you, while hordes of invisible Hollow Acolytes will manifest upon engaging you in close combat.
The Sunless Angels each share the same abilities to cast Comet and Blizzard, and when close, they will attack in melee.
A teleportation spell is needed to reach all the angels.
Reward
Defeat one of the Angels on Hell difficulty to get the Angel Bag.
Transmute six of these bags in the Horadric Cube to obtain a Six Angel Bag charm.
Required Level: 90
Keep in Inventory to Gain Bonus
(3 to 5)% Innate Elemental Damage
Fire Resist +(21 to 25)%
Lightning Resist +(21 to 25)%
Cold Resist +(21 to 25)%
Each angel has a 1/6 chance to drop a Sunless Crystal Bird.
Transmute your Six Angel Bag with this statue in the cube for an extra bonus.
This upgrade recipe adds the following bonuses:
3% Chance of Crushing Blow
+(-3 to 5) to Light Radius

The Secret Cow Level
REQUIRED LEVEL: 110
DIFFICULTY: EASY
Location
Act 1: Rogue Encampment
Find Wirt in Tristram
Drop Bias
Increased chance to drop junk items (potions, quivers, signets).
Lore
Were the rumors true all along? An army of anthropomorphic cows, a key to another dimension embedded in a wooden leg, a land devoid of human reason... How can this madness be real?
Who is behind this lunacy? Where to find answers to these questions? Or in this chaos is it more appropriate to ask "when"? A step through the portal is the only possible first step towards comprehension. Or hysteria...
Strategy
Be careful and do not trust the calm before your eyes. The whole area is swarming with camouflaged cow warriors,
a single movement in the wrong direction and you'll be surrounded by dozens of them.
The bovine regiment features in its ranks Cow Ninjas, Cow Soldiers, Cow Summoners and Cow Shamans.
Know your enemy, it could make a difference between surviving and becoming fodder.
Unlike in Diablo II, killing the Cow King does not prevent you from entering the Cow Level again.
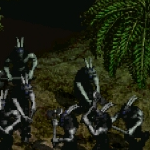
Torajan Jungles
REQUIRED LEVEL: 110
DIFFICULTY: EASY
Waypoint
Location
Act 3: Kurast Docks
Drop Bias
Increased chance to drop signets and runes.
Lore
The Torajan Jungles are an immense, verdant, teeming landscape that span most of the southwestern expanse of Sanctuary's eastern continent.
The jungles, strange and exotic, during their enigmatic history have cultivated many civilizations of which nearly all have been lost to the annals of time.
In the aftermath of the Dark Exile, Mephisto hold on the region has become a plague that leeches the land of its spiritual strength, binding the inhabitants to his schemes with chains of unrelenting hate.
Strategy
Insect swarms and poisonous spiders will waste no time in attacking you so make sure that your poison resistance is very high.
Khazra clan are ranged, fanatical axe throwing goatmen which delight in making you chase them around while the rest of their clan
attacks from a safe distance. If possible try to eliminate them quickly and do not follow them into the unknown lest you run into
more enemies unprepared. Especially if they are Forest Keepers, which will attempt to stun you on sight with a powerful shockwave
and are extremely mighty melee fighters. And in addition, the Followers of Akarat roam these jungles, unleashing a barrage of hammers upon first spotting an enemy.
DIFFICULTY: MODERATE
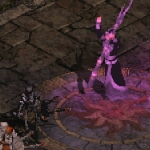
Kurast 3000 BA
REQUIRED LEVEL: 115
DIFFICULTY: MODERATE
Location
Act 3: Torajan Jungles
Drop Bias
Increased chance to drop set items and shrines.
Lore
Three millennia ago, on the outskirt of today's Kurast, once stood the fascinating capital city of Kehjan. It was home to both the Cathedral of Light and the Temple of the Triune, thus became a macabre seat of war.
In the centuries after, while peering in the timeflow, the Taan Mage Clan unintentionally breached the timestream, forming a time-rift leading to the cruel bloodbaths in the ancient Kehjan.
Everyone was slaughtered and a powerful curse fell on the region, imprisoning the souls of the deceased into their wretched remains.
The rift was discovered almost two millennia later by three mages of the Ennead Clan, whos marveled at the opportunity of advancing their studies on transmutation magic.
The mages experimented on the stagnating souls trapped within the scattered bones, and built totems able to protect their material from further dacaying.
Although, ultimately, Mephisto's influence on Kehjistan reached and pervaded their mind.
Strategy
The ruins are engulfed by armies of hawks undead. Also you will find the Shadowgate Totems, which emit a magical field that grants a large damage reduction to nearby units as well as emitting a damaging field to protect them from melee attackers.
Your targets are the Ennead Necromancers spread out around town. They resurrect hawks and cast the powerful Miasma curse, slowing you down and increasing your physical damage taken.
Reward
Defeat the Ennead Necromancers on Hell difficulty to get the Hammer of the Taan Judges (1/3 chance).
Required Level: 90
Keep in Inventory to Gain Bonus
+1 to All Skills
+1 to Necromancer Skill Levels
+(21 to 25) Spell Focus
Weapon Physical Damage +0.1875% (Based on Character Level)
High Heavens
REQUIRED LEVEL: 115
DIFFICULTY: MODERATE
Locations
Act 4: Diamond Gates
Act 4: Silver City (Town)
Act 4: Library of Fate
Act 4: Silver Spire Level 1
Act 4: Silver Spire Level 2
Act 4: Crystal Arch
Kill Izual in the Plains of Despair to open a Portal to the High Heavens.
Drop Bias
Increased chance to drop rare items.
Lore
The wound elicited by Izual's betrayal was much more profound than what Tyrael's speculations led to believe.
The fallen angel, exploiting his knowledge of the High Heavens, had indeed managed to temporarily bridge his former birthplace with the Burning Hells itself, allowing for Diablo's demonic corruption to silently seep in.
The lingering angelic spirits were tainted and subverted into avatars of evil, relentlessly spawning ethereal manifestations of their depraved nature, and the golden pillars adorning the halls were twisted into deadly totems spewing poison bolts.
The Silver Spires have been quickly flooded by the ethereal presences and the Silver City seems to have remained the only pristine location. But for how long?
Strategy
Ethereals attack furiously. The totems are impossible for mortals to destroy and should best be avoided. Keep a close eye on your minions: their deaths will heal all Ethereals and Avatars.
Zakarum's Avatars still retain features from their divine-self and watch the battle, beware that their fading divine grace enables them to ignore a percentage of all incoming attacks.
Reward
Defeat Zakarum's Avatars on Hell difficulty to get the Zakarum's Ear (1/6 chance).
Required Level: 90
Keep in Inventory to Gain Bonus
(6 to 10)% to All Attributes
+(6 to 15)% to Experience Gained
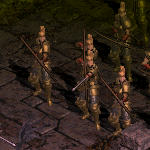
Tran Athulua
REQUIRED LEVEL: 115
DIFFICULTY: MODERATE
Waypoint
Location
Act 2: Halls of the Dead Level 3
Kill Kethryes to open a portal to Tran Athulua.
Drop Bias
Increased chance to drop unique items.
Lore
The Dark Wanderer's shadow, cast on the scorching sands of Aranoch, has delivered a deadly challenge from the deity Kethryes, consort of Athulua.
A crew of pirates roaming the Twin Seas, while approaching Lut Gholein's harbor, fell victim to the spreading corruption afflicting Khanduras and, once they began pillaging the Skovos Isles, the Prime Evils found the Askari civilization under their reach.
Amazons' arboreal seat of power, Tran Athulua, is now under Hell's influence and the priestess bearing the isles' namesakes and their armies are at its bidding.
Any and every opposition must be destroyed: for the Askari forces to join the demonic legion would spell assured devastation upon all the lands.
Strategy
Tran Athulua is heavily guarded by bow-wielding Amazon warriors, whose numbers and seeking arrows may overwhelm a weaker hero. Beware the Trees of Fire with their ability to cause devastating wildfires.
The priestesses of the three elements, Philios, Skovos and Lycander watch over the city and can be distinguished by their heavy armor and glowing aura.
They are dangerous foes due to their Phalanx spell and the ability to call Lava Pit, Blizzard, and Magnetic Field.
Reward
Defeat the elemental priestesses on Hell difficulty to get reagents to form the Sunstone of the Gods:
Required Level: 90
Keep in Inventory to Gain Bonus
(3 to 5)% Innate Elemental Damage
Maximum Life +(3 to 5)%
Maximum Mana +(11 to 15)%
4% chance to drop a trophy fragment on Hell difficulty.
The priestesses also have a 1/6 chance to drop an Askari scroll which is used to summon Athulua, the Amazonian Goddess.
DIFFICULTY: HARD
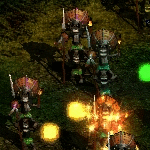
Teganze
REQUIRED LEVEL: 120
DIFFICULTY: HARD
Location
Act 3: Torajan Cemetery (Torajan Jungles)
Drop Bias
Increased chance to drop Essences and Runestones.
Lore
In one corner of the dreadful Torajan Cemetery stands the entrance to a secret passage leading to the mystical Teganze region, an obscure patch of the jungles inhabited by the reclusive Umbaru tribes.
The fearsome Witch Doctors swarming the region, are engaged in ritualistic warfare waiting to seize the chance to sacrifice a worthy warrior as offering to the gods residing in Mbwiru Eikura, the Spirit Realm.
At the core of this unforgiving land, where the gate to Mbwiru Eikura is located, a dark presence has gushed from death's abyss with intent to destroy any trespasser.
Strategy
The Umbaru brandish potent ranged spells that inflict damage based on their elemental alignment. They tend to do massive damage until you reach 80% resistances, and besides absorb all damage from their respective element.
They also have a chance to rise from death, so watch out! The entrance to Mbwiru Eikura is guarded by Zagraal. He is a demon which the Umbaru used to control the khazra, aiding them in their fight against the Vizjerei.
He has a powerful elemental attack, soulstealer abilities, and he will occasionally transform into a bat to dodge any attacks.
Reward
Defeat Zagraal in the depths of Teganze, on Hell difficulty, to get the Umbaru Treasure charm.
Zagraal also has a high chance of dropping an Essence.
Required Level: 120
Keep in Inventory to Gain Bonus
Cube with Essence/Runestone to Roll Stat
+(6 to 10)% to Spell Damage
Essence Slots: 20
This charm can be upgraded with essences to add the following bonuses:
(-3 to 5) to Dexterity
(-3 to 5) to Vitality
(-3 to 5) to Energy
Essence Slots: -1
On Hell difficulty you will come by the Elemental Essences and
Runestones by killing the umbaru spirits. You can cube them to get the Elemental Runes.
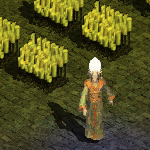
The Triune
REQUIRED LEVEL: 125
AREA LEVEL: 130
DIFFICULTY: HARD
Location
Act 3: Bastion of the Triune (Caldeum → Rathma Square)
Kill the Stormtree at the Lower Kurast entrance and open a Portal to Caldeum
Kill Primus to open a portal to the Bastion of the Triune
Drop Bias
Increased chance to drop Cycles.
Increased chance to drop equipment and higher equipment quality.
Lore
Upon his death, the sudden release of the arcane powers consolidated by the Primus tore a rift in Sanctuary's reality-frame, materializing a gateway to a previous time.
Here lies the long gone Bastion of the Triune, the temple of the Cult of the Three encompassed by the mystifying jungle.
The location hosts swarms of demons to assist Lucion, son of Mephisto and Grand Priest of the temple, while he makes preparation to gift Malic, head of the Order of Mefis, with a demonic charm to aid him in the assassination of Uldyssian.
The dire consequences would be unspeakable. But how to prevent their plot from bearing the fruit of success?
Lucion is a formidable opponent, covered in scales said impossible to be pierced, while Malic is regarded as the strongest human to ever have served the Prime Evils.
Challenging directly either one of them would spell certain death. An answer could maybe be found in the temple...
Strategy
Advance carefully, the Triune is defended by a host of powerful constructs and revenants: the ghastly Impaler Archons spitting beams of white-hot energy, the cold Kraken Guards hunting their own dying grounds, the homuncular Primal Clays, and the Temple Spires that rain down destruction all around them.
To defeat Lucion you must find a way to convince him to fight Malic. There are rumors of an even queerer creature possessed by the demon-of-deceit Lilith, who could hold the key... to Mind Control.
Cycles
The Triune on Hell difficulty is the only place where you can find Cycles.
You can combine them with the Corrupted Wormhole to create your personalized charm. See THIS PAGE for more information about Cycles.
Reward
Defeat Lucion, Primus of the Triune on Hell difficulty to get the Corrupted Wormhole.
Required Level: 100
Keep in Inventory to Gain Bonus
6% chance to drop a trophy fragment on Hell difficulty.
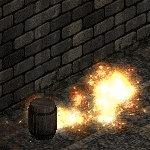
Duncraig
REQUIRED LEVEL: 120
DIFFICULTY: HARD
Locations
Act 1: Subterranean Corridor (Bramwell, Rogue Encampment)
Act 1: Corrupted Abbey
Drop Bias
Increased chance to drop sacred items.
Lore
With the Prime Evils on the move, their apostles hastily followed.
Assur, baron of the Burning Hells and Diablo's favored, breached with his demonic Necromorbs into the town of Duncraig, ravaging its inhabitants in an unholy blaze, and defiling them into unhinged figures with a sole command carved on their souls: slaughter.
The Lord of Terror himself branded Assur with an occult rune which engulfs his flesh in vigorous arcane flames, rendering it immune to harm from mortals hands.
All resistance on his path has been incinerated, and in their march to the conquest of Westmarch his new horde is approaching Bramwell. Soon the infernal baron's scourge will befall on the lands.
Strategy
The possessed souls and their Necromorb overseers are straightforward battles, but beware the ones that rush at you with lit powder kegs! They can throw the kegs over large distances and then light the fuse, causing a devastating explosion.
Assur wields powerful fire magic, but the main threat is his invulnerability, it is impossible to damage him directly. Retrieve the five demon seals from Assur's lieutenants: Skinrender, Spinecracker, Eyegouger, Fleshcutter and Bonehexer.
On Hell difficulty each lieutenant drops his own seal. When you have the five Seals, kill Lost Souls and Necromorbs until a Ring of the Five drops, cube it with all five seals to create Assur's Bane.
Wear the ring, go back to Assur, then select the Purify spell. This spell bypasses Assur's invulnerability and will take him out in a few hits.
The Secret
Retrieve the five demon seals from Assur's lieutenants: Skinrender, Spinecracker, Eyegouger, Fleshcutter
and Bonehexer. On Hell difficulty, each lieutenant drops his own seal. When you have the five Seals, kill Lost Souls and Necromorbs
until a Ring of the Five drops. Cube it with all five seals to create
Assur's Bane. Go back to Assur, then select your ring's Purify
spell. This spell bypasses Assur's invulnerability and will take him out in a few hits.
Reward
Defeat Assur on Hell difficulty to get Demonsbane.
By Robert Marks
Required Level: 120
Keep in Inventory to Gain Bonus
+(0 to 2) to Sorceress Skill Levels
+(0 to 2) to Paladin Skill Levels
+(0 to 2) to Necromancer Skill Levels
+(0 to 2) to Druid Skill Levels
+(0 to 2) to Barbarian Skill Levels
+(0 to 2) to Assassin Skill Levels
+(0 to 2) to Amazon Skill Levels
+15 Life Regenerated per Second
6% chance to drop a trophy fragment on Hell difficulty.
DIFFICULTY: VERY HARD
Viz-jun
REQUIRED LEVEL: 125
DIFFICULTY: VERY HARD
Location
Act 3: Proving Grounds (Swampy Pit)
Drop Bias
Increased chance to drop jewels.
Lore
In a universe of divine evils and mortal corruption, can knowledge damn a soul?
The Viz-Jaq'Taar sought an answer in their mechanised city of Vizjun, rebuilt from its ruins after the Mage Clan Wars.
Its techsmiths conceived the Master Control System as the incorruptible overseer of the Mageslayers' Order, upholder of their doctrine.
However, on its conception, Vizjun plunged in turmoil. All of the Order's devices were transfigured, becoming of flesh, yet also machine.
Soon the city fell silent, and a thunderous voice's echo erupted: "I am flesh and I am impure. I am choice and I am tyranny. I am the scion in your image."
Strategy
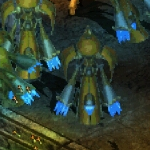
Vizjun features melee robots, laser robots and machine-bolter robots. You should know what to do by
now. But watch your step: Vizjun's automated defences will periodically deploy additional robots,
chaingun sentries, minefields and even nuclear MIRV strikes when you enter the protected zone. The computer
voice warns you of any incoming attack. The level boss, MCS has plasma interference shields and is invulnerable
to normal damage. To destroy it, use the handy
Purify skill you acquired in Duncraig. One shot should be enough.
Reward
Defeat the MCS on Hell difficulty to get the Cold Fusion Schematics.
Required Level: 125
Keep in Inventory to Gain Bonus
1% Chance to cast level 10 Time Strike on Striking
+(11 to 30) to Strength
+(11 to 30) to Dexterity
+(11 to 30) to Vitality
+(11 to 30) to Energy
6% chance to drop a trophy fragment on Hell difficulty.
Fauztinville
REQUIRED LEVEL: 125
DIFFICULTY: VERY HARD
Location
Act 5: Fauztinville
The enchanted Black Road artifact, fortified by the crystallized essences of the sealed Spirits, has achieved the ability to open a portal to an unknown plane.
Drop Bias
Increased chance to drop runes, Unique Mystic Orbs, Fauztinville Great Runes and shrines.
Lore
In this parallel dimension a few lesser Mage Clans such as the Harakas, the Behistun and the Sarandesh, survived the Sin War's onslaught, established the wondrous city of Fauztinville and prospered during the "Age of Magic" united under the Fauz-Tin Clan's banner.
Centuries after, the adjacent Kehjistan Empire grew conspicuously uneasy of the Fauz-Tin's prominence, and ordered the most renowned Mage Clan inhabiting their lands, the Vizjerei, to make preparation for war.
Tells of Fauztinville's might were enough to settle all of the Vizjerei's internal divisions, and leadership was handed over to the warlord Bartuc who promptly made plans for a preemptive assault.
With the help of his powerful brother Horazon, Bartuc rose a vast army of vile golems known as Necrobots, and, once cloaked by the night, marched relentlessly with his metal pawns to the end of the board.
Order to commence the assault was issued and the city prestige did nothing to blunt its unspeakable demise... the Fauz-Tin's hegemony didn't go uncontested.
The cursed Fauztinville's ruins were deemed too dreadful to even be annexed to the Empire's territory, and place worthy of the Burning Hells was forever embedded into Sanctuary.
Strategy
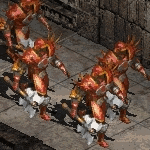
Each battle should be straightforward, but beware of the enemies' various resistances. Summoners should eliminate Harpylisks first to prevent their bouncing blade attack from ravaging their forces.
The five Necrobots generals, Alpha, Beta, Gamma, Delta and Epsilon, are there too. Find them in the back alleys of Fauztinville and destroy them.
Reward
On Hell difficulty you can find the three Fauztinville Great Runes here. These runes are required for the most powerful runewords.
The Necrobot generals will now drop Positronic Brains. Used for crafting the Catalyst of Transference.
DIFFICULTY: EXTREME
Scosglen
REQUIRED LEVEL: 135
DIFFICULTY: EXTREME
Location
Act 5: Scosglen (Arreat Summit)
Defeat Narthal, and then Bul-Kathos on the old Arreat Summit to access Scosglen.
Lore
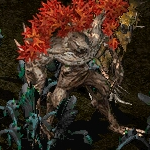
Uileloscadh Mór, the prophesied day, has befallen Sanctuary. Baal's legion of destruction has already spilled the blood of the sons of Bul-Kathos and now aims at that of Fiacla-Géar kin. Like their Barbarian brethren, they have sworn to protect the powerful mysteries below the peaks and now the mystical forests of Scosglen are being violated. The demonic conquest tears its way towards uncovering the secrets of these lands and corrupts all of their might.
Do not let Baal's forces subjugate the Druids and their sacred homeland.
Drop Bias
Increased chance to drop Enhanced Runes, Relics, sacred base items, and Oils of Conjuration, Greater Luck, Augmentation, and Intensity.
Etherborns always drop at least rare quality items and have a chance to drop entire Arcane Crystals.
Sapling Guards have the highest chances to drop one or several runes.
Reward
Defeat any of the six Corrupted Druids to get a Corrupted Treasure. You can unlock this treasure:
The higher the Enhanced Rune, the better the reward. Some of the treasures you can find include: Sacred Unique items, Jewelry with the Lottery bonus, Unique Mystic Orbs, Emblems, Large Cycles, Relics, Jewel of Luck, ...
Corrupted Crystals
One of the items that can be in a Corrupted Treasure are the Corrupted Crystals and Corrupted Shards (which can be used to make the crystals).
Using these crystals you can corrupt items, which will potentially add powerful stats, do nothing or ruin it for good! This is only applicable to sacred items, amulets, and rings of the magical/rare/crafted/unique/runeword quality. An item can only be corrupted once.
It is possible to create a Corrupted Cluster, which you can use to collect all your Corrupted Crystals:
Dúlra Aegis
If you are especially lucky when opening a Corrupted Treasure, you can obtain the Dúlra Aegis charm item design, or any of the six Tenets required to make it (Vigor, Wisdom, Judgement, Conflict, Harmony & Restraint).
Once assembled, you can pick the bonus you want the charm to have:
If you change your mind, you can cube it again with a different Perfect Gem.
The Dimensional Labyrinth
REQUIRED LEVEL: 126 - 135
DIFFICULTY: VERY HARD - EXTREME
LOCKDOWN: each floor 20 seconds
Location
Access by using a Riftstone (obtained by defeating the Ascendant Riftwalker in the Invasion III quest).
Lore
Outside the order of the Mortal Realm, in the midst of a boundless sea of raging darkness, the maddening chambers of the Dimensional Labyrinth rest beyond reality.
Riftstones, bleeding from this strange dimension, have started to appear across Sanctuary and can be used by arcanists to cross the unfathomable divide. Some interpreted this as a benevolent invitation, others as keys to the Heavens' gates; but many of the travelers never came back whilst the few who did still shrivel in horror, with fractured psyches unable to unravel what lies on the other side.
Find the means to access this realm and journey through the linked dimensions, you must find an answer for this cryptic menace.
Strategy
The Labyrinth is a chain of 15 separate levels using randomly generated layouts. To gain access to it you must find a depleted Riftstone anywhere in Sanctuary. Once inside - clear the dimension of its denizens, which may drop the Rifstone needed
to access the next level in the chain. With each level above the first monsters gain unique modifiers, which stack and compound as you go deeper in the Labyrinth.
To see these modifiers transmute your Charged Riftstone in the Horadric Cube.
Elemental resistances are extremely important in these rifts and especially increasing their maximum values.
The 20 second lockout in later levels means that it is more important to make sure your defences are in order and you manage
to full clear the zone, to maximise Riftstone drop chances. Rather than focus solely on damage, which may clear faster but
at a greater risk of losing your Riftstone. From level 2 onwards different types of mini bosses may spawn. These can drop quest
items which convey the lore and are used to apply a trophy upgrade to the reward charm.
Occult Effigies
Here you can also find Occult Effigies. These are unique reagents which can be applied to
your items like Mystic Orbs. However, unlike Mystic Orbs, Effigies are not affected by Mystic Orb effect multipliers.
These are all the Effigies which you may currently find:
|
Celestial Wind Occult Effigy Cube Reagent Cube with Boots to Add Bonus Set Movement Speed to 40% +10 Required Level |
Sigil of Absolution Occult Effigy Cube Reagent Cube with Any Weapon/Armor to Add Bonus -5 Required Level Requirements +25% (Max 2 Uses per Item) Cannot be Used with Runewords |
|
Path of Brutality Occult Effigy Cube Reagent Cube with Unique Ring/Amulet to Add Bonus Transforms every +1 to All Skills to +3% Deadly Strike Item Becomes (Your Class Only) +10 Required Level |
Empyrean Touch Occult Effigy Cube Reagent Cube with Any Weapon/Armor to Add Bonus Item Becomes Ethereal +10 Required Level |
|
Elemental Ire Occult Effigy Cube Reagent Cube with a Quiver to Add Bonus Adds 40-60 Fire Damage Adds 40-60 Lightning Damage +10 Required Level |
Breath of Thaumaturgy Occult Effigy Cube Reagent Cube with a Blessed Crafted Weapon/Armor to Add Bonus Item can be blessed Again +25 Required Level |
|
Elemental Dominion Occult Effigy Cube Reagent Cube with a Zero Socket Weapon to Add Bonus Adds 75-125 Fire Damage Adds 75-125 Lightning Damage Adds 75-125 Cold Damage +10 Required Level |
Arcane Hunger Occult Effigy Cube Reagent Cube with a One Handed Weapon with at least 15% Life Leech to Add Bonus All Life Leech transformed to +20% Spell Damage Item Cannot be Unsocketed (Max 1 Use per Item) +10 Required Level |
Mystic Dyes
The Dimensional Labyrinth is the only place where you can find Mystic Dyes, allowing you to recolour your equipment.
Dimensional Key
Obtained through killing one of the corrupted heroes, Onslaught, as shown, is just one of the few variants of keys available.
Dimensional Key
Required Level: 130
Keep in Inventory to Gain Bonus
Trial of Purity
Defeat the monster Heroes, Champions and Sovereigns roaming the Labyrinth
Transmute charm once with each Star Chart piece and Dream Fragment
(these items are rare drops from Labyrinth mini bosses)
Trial of Discovery
Explore every level of the Labyrinth
Transmute charm once with each Depleted Riftstone
(must be done in ascending order)
Trial of the Nephalem
Complete all of the above Labyrinth Quests
Transmute the charm with a Celestial Wind effigy
End the Invasion
Defeat Deimoss the Fleshweaver in the Labyrinth depths
Transmute charm after boss death
The keys are dropped by the following heroes, and listed also is the type of build they are intended for:
- Arcana: dropped by Corrupted Assassin, intended for spell damage based builds
- Mandate: dropped by Corrupted Necromancer, intended for summoner based builds
- Onslaught: dropped by both Corrupted Barbarian and Corrupted Amazon, intended for physical based builds
- Primordia: dropped by both Corrupted Barbarian and Corrupted Amazon, intended for IED based builds
Trial of Discovery
Cube riftstones in order to receive Magic Find up to 75%
Trial of Purity
Cube Star Charts and Dream Fragments to receive either of the following bonuses depending on your key:
- Arcana: up to 35% Spell Damage
- Mandate: up to 100% Minion Damage
- Onslaught: up to 75% Weapon Physical Damage
- Primordia: up to 16% Innate Elemental Damage
Star Charts and Dream Fragments
They may be found from the following monsters, respectively:
Star Charts: Corrupted Assassin, Abyssal Shrine, Navigator and Unstable Anomaly
Dream Fragments: Corrupted Amazon, Corrupted Barbarian, Corrupted Necromancer, Gharbad the Weak, and Phoboss