Dungeons
Dungeons
Dungeons are quest-like zones which usually consist of defeating a boss for a unique charm reward.
Certain bosses may also drop a trophy fragment for additional upgrades, but they are rare.

DIFFICULTY: VERY EASY
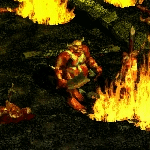
Horror Under Tristram
DIFFICULTY: VERY EASY
LOCKDOWN: 20 seconds
Location
Butcher's Lair (Act 1: Tristram)
Lore
A bloated and grotesque creature, the Butcher was a sadistic being that relished in the torture and pain of others. It hunted endlessly for fresh meat.
Although retellings of the Darkening of Tristram describe how the Butcher was defeated deep within the Labyrinth, the horrific culling of the city in recent times, following the Dark Wanderer's wake, seems to have stirred this malevolent spirit back to evil once more.
Strategy
The Butcher is a strong melee fighter. His tainted cleaver hits hard and just like in the Tristram Cathedral, he will hunt you down.
Upon striking you or a minion, he has a chance to incite a Bloodlust which fuels Sacrificial Shrines into emitting heavily damaging shockwaves.
And to boot, he also is considerably tanky.
Reward
Defeat the Butcher on Hell difficulty to get The Butcher's Tooth.
Required Level: 90
Keep in Inventory to Gain Bonus
+10 to all Attributes
20% Magic Find
+1 to Light Radius
Horror Under Tristram (Heroic)
Difficulty Level: 120
Transmute in the cube after reaching Level 120
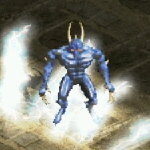
Invasion
DIFFICULTY: VERY EASY
LOCKDOWN: 20 seconds
Location
The Storm Oasis (Act 2: Harem Level 1)
Lore
Amongst the demonic hordes in Jerhyn's Palace a mystifying rift appeared,
leading to a garden of ruins consumed by a black abyss and swallowed by sands of gold.
Here a creature bearing a wicked gaze set on conquest stands vigil. It brandishes magic that pierces the air with the ferocity of thunders and that shattered Greiz's warriors as they were motes of cinder confronting a tempest. The wise Drognan believes the creature to have come from a plane further astray than even those of Angels and Demons, breaching into Sanctuary by tracing the arcane energies oozing from the forgotten Vizjerei fortress upon which Lut Gholein's
foundations lie.
Reward
Defeat the Lesser Riftwalker on Hell difficulty to get the Riftwalker's Eye.
Required Level: 90
Keep in Inventory to Gain Bonus
+1 to All Skills
+15% to Experience Gained
Bonus Quest I
(cube charm only on completion)
Defeat the Greater Riftwalker
- without taking damage from the Rift Storm
Bonus Quest II
(cube charm only on completion)
Defeat the Ascendant Riftwalker
- with at least one Frozen Shambler alive
- without taking damage from the Rift Storm
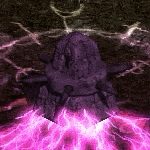
Death Projector
DIFFICULTY: VERY EASY
LOCKDOWN: 30 seconds
Location
The Proving Grounds (Swampy Pit - Flayer Jungle)
Lore
A mighty siege weapon whose atrocities can be traced back to the Eternal Conflict, where it annihilated countless angelic forces of the Heavenly Host, turning the tide of several wars.
The Death Projector earned its name on the battlefield, and despite it could be considered a relic of the ancient past, it is restlessly tended to by corrupted Zakarumite techpriests, keeping it deadly and efficient.
It's a true embodiment of Mephisto's hatred, and a single moment of hesitation in its presence could prove fatal.
Strategy
The Death Projector slowly rotates, firing devastating energy beams in a full circle, destroying anything in its path.
Its magitech shield is impenetrable to weapons and spells, but when it senses 2 officers nearby, it lowers it to enable maintenance.
In this state, the device can be damaged, though its fortified outer shell still harmlessly deflects a percentage of all incoming attacks.
The officers themselves are bound to their duty by potent dark magic, and they will not cease to hunt you down, do not underestimate them.
Damage the Death Projector while avoiding the officers until it crumbles.
Reward
Defeat the Death Projector on Hell difficulty to get the Laser Focus Crystal.
Required Level: 90
Keep in Inventory to Gain Bonus
Maximum Life +3%
Maximum Mana +10%
+10% to Experience Gained
Death Projector (Heroic)
Difficulty Level: 121
Transmute in the cube after reaching Level 121
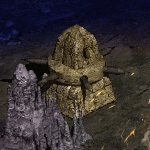
Infernal Machine
DIFFICULTY: VERY EASY
Location
Infernal Cave (Act 1: The Pit)
Lore
One of the most wicked creation devised by the armorer Hephasto in the depth of the Hellforge.
Hundreds of demonic souls, from the high ranks of the Burning Hells' legions, are fused with iron and trapped within the stone of this vicious contraption.
These demons were previously aligned with Azmodan, the Lord of Sins, during his first attempt to seize power from the Prime Evils, and, as punishment, were turned under Baal's order into guard dogs chained by the soul to this device.
Powerful runes were embedded in the mechanism allowing the wrathful souls to take material form and cast their anger on intruders of the sentry's domain.
Strategy
Move quickly, because time is against you. For the manifested demons the death of their material form is just a minor setback, they'll be shortly resummoned by the Infernal Machine.
Beware also of the device itself: once attacked it will automatically responds with mighty rune magic. Try to reach it as quickly as possible, avoiding or teleporting past the elites monsters and their status attacks.
Reward
Defeat the Infernal Machine on Hell difficulty to get the Optical Detector.
Required Level: 90
Keep in Inventory to Gain Bonus
Unlocks Mastery Skill: Tenacity
+5% to Summoned Minion Resistances
Elemental Resists +15%
Infernal Machine (Heroic)
Difficulty Level: 122
Transmute in the cube after reaching Level 122
DIFFICULTY: EASY
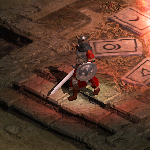
The Binding of Baal
DIFFICULTY: EASY
LOCKDOWN: 20 seconds
Location
Act 2: Tal Rasha's Tomb
Kill Zoltun Kulle to open a Portal to the old Canyon of the Magi.
Lore
Tal Rasha was one of the most powerful Horadric mage that ever lived and was by every right the leader of the Brotherhood of the Horadrim.
Together with the other members of the Horadrim Order, he was tasked by the archangel Tyrael with the hunt and capture of the Prime Evils.
He met his end after a furious battle against Baal, the Lord of Destruction, ultimately sacrificing himself to become the sealing vessel in which the Prime Evil would have been imprisoned.
Strategy
Stepping into the time portal you'll find yourself trapped into Baal body and be forced to face against the Brotherhood of the Horadrim.
To protect their leader, the Horadrim weave warding spells making Tal Rasha immortal until the last of the mages has died and their spirits have faded.
Even then, Tal Rasha casts a phasing spell that negates a percentage of incoming attacks and their elemental affinity grants all mages 50% resistance to the elements.
Being magical in nature, the protective aura is vulnerable to resistance breaking spells, offering you another way to deal with the Order leader.
Beware the Horadrims' fire, cold and lightning spells, they're extremely adept in the arcane arts and are able to pierce up to 30% of your resistances, Tal Rasha up to 40%.
Reward
Defeat Tal Rasha on Hell difficulty to get the Scroll of Kings.
Required Level: 90
Keep in Inventory to Gain Bonus
+10% to Spell Damage
20% to All Attributes
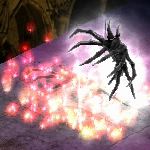
Horazon's Sanctum
DIFFICULTY: EASY
LOCKDOWN: 20 seconds
Location
Dimensional Sanctum (Act 3: Caldeum)
Kill the Stormtree in the Lower Kurast entrance and open a Portal to Caldeum
Lore
Horazon the Summoner, seeking further knowledge, summoned in his arcane sanctum a mighty demon lord imbued with powers strong enough to overwhelm the sorcerer. Quickly the full might of the sullen creature was brought to bear on Horazon's broken determination. Unable to defeat the demon without paying with his life, he trapped the creature in the farthest reach of his sanctuary and split off the prison zone from the rest, banishing it... temporarily.
Strategy
Heed the familiar's holographic warning. The Creature of Flame, although not very strong on its own, has the ability to open
Dimensional Rifts, summoning demons from the depths of hell. If unprepared, the player can become overwhelmed.
Not only can it open rifts, but can defend itself with a mortar attack and Lava Pit.
Reward
Defeat the Creature of Flame on Hell difficulty to get Horazon's Focus.
Required Level: 90
Keep in Inventory to Gain Bonus
(3 to 5)% Life stolen per Hit
(3 to 5)% Mana stolen per Hit
-50 Defense
+(21 to 25) to all Attributes
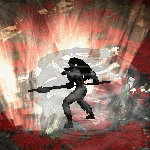
Akarat
DIFFICULTY: EASY
Location
Torajan Jungles
Lore
Akarat the Prophet was the ascetic who founded the religion and customs of the Zakarum Church. He did so after the visit of Archangel Yaerius in his dreams and set out on a grand journey to the cities of Kehjistan to enlighten others about the divine Light he claimed existed within everyone. However, clouded by uncertainties, it is said that one day he simply disappeared in the Kehjistan's jungles. While his teachings had left their mark, they would flounder in obscurity for a millennium, and now a Zakarum priest chosen by Mephisto has taken the Prophet's name and moves with his follower to corrupt Akarat's legacy upholding the teachings of the Prime Evil.
Strategy
The corrupted spirit of Akarat is protected by heavenly invulnerability and is impossible to attack
directly. Remember that a religion is nothing without followers, therefore strike down his surrounding apostles first.
The death of one of his apostles unleashes a wave of holy energy, reducing all resistances of other
apostles to -100% and breaking the immunity shield of Akarat himself, reducing all resistances to
0% for a few precious seconds. This does however enrage them and they will attack you with renewed
vigour. Killing an apostle may be difficult due to the mass healing spell they cast when low on health,
as well as the storm of magical hammers with which they pummel you from a distance and their ability
to heal when they slay a minion or hero. Akarat himself is blessed in another way as well: the spirits of the
Light repel a percentage of all incoming attacks.
Reward
Defeat Akarat on Hell difficulty to get the Visions of Akarat.
Required Level: 90
Keep in Inventory to Gain Bonus
+(201 to 250) Defense
+(21 to 25) to all Attributes
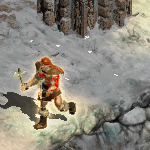
Assault on Mount Arreat
DIFFICULTY: EASY
LOCKDOWN: 2 minutes
Location
Arreat Summit (Act 5: Arreat Summit)
Kill Narthal to open a portal to the old Arreat Summit.
Lore
In ages past, in his quest to dominate humanity, Diablo himself attempted to invade Mount Arreat to corrupt the Worldstone,
but was fiercely met by the Shadow Wolf Tribe defenders and their leader, the legendary Bul-Kathos.
The powerful tribe warriors achieved mastery over the axe fighting arts,
and were able to fend off against the Lord of Terror's assault by keeping it at bay with mighty throws.
Bul-Kathos, possessing additional knowledge about the secret of the steel and the sword, challenged Diablo while dual-wielding blades,
casting his spells with enhanced vigor. The clash between the two forces ended up costing the lives of several tribesmen but in the end the
Prime Evil was successfully warded off.
Strategy
The Shadow Wolf Warriors wield the Hawk Talons ability, a trap which releases axes,
the ability to cast a Guard Tower, as well as mastery over axes throwing attacks.
Thanks to their deep connection to the primal forces, all tribesmen have an innate 50% resistance to all.
Bul-Kathos can also cast Hawk Talons, but instead of Guard Tower, he casts Fortress. Keep a cold mind and use the surrounding to your advantage.
Reward
Defeat Bul-Kathos on Hell difficulty to get the Sacred Worldstone Key.
Required Level: 90
Keep in Inventory to Gain Bonus
Weapon Physical Damage +(25 to 30)%
(21 to 30)% Bonus to Defense
Lord Aldric Jitan
DIFFICULTY: EASY
Location
Torajan Jungles
Lore
Lord Aldric Jitan, the aristocrat in whose veins flows the blood of the powerful lineage of the Sons of Rakkis, driven by mysterious nightmares and visions, gathered to his side several Guardsmen and started traveling on hidden paths towards the core of the Torajan Jungles. He desperately hunts what keeps manifesting in his arcane dreams: the Moon of the Spider, a scroll containing knowledge on the summoning of Astrogha, a vile demon able to plunge the land into darkness. Every instant he get closer to the esoteric artifact, Aldric's latent magical skills surge to new heights. Echoes of his power can be perceived across the jungles, suggesting that his quest is at its conclusion.
Strategy
The Guardsmen are tougher than anything that came before and will inflict tri-elemental damage and, even on their last breath, will summon guard towers powerful enough to slaughter you if you stand still for too long.
Keep moving and the towers will vanish behind you. Lord Aldric Jitan himself is a formidable foe with power to rival dozens of his Guardsmen, and he will clad himself in a swirl of Pestilence.
Remember, this is not a fight you want to underestimate.
Reward
Defeat Lord Aldric Jitan on Hell difficulty to get the Moon of the Spider.
By Richard Knaak
Required Level: 90
Keep in Inventory to Gain Bonus
+(21 to 25) Spell Focus
+1 to Jitan's Gate
Half Freeze Duration
Inquisitor of the Triune
DIFFICULTY: EASY
Location
Act 3: The Chamber of Offering (Torajan Jungles)
Town Portals are disabled until the Inquisitor of the Triune is defeated
Lore
Almost three thousand years after the forces of the Triune and the Edyrem led by Uldyssian clashed, a broken and buried remnants from that cruel time awakened from his slumber. The ancient evil Thonos, invigorated by Mephisto's presence enveloping the Kehjistan region, made his presence known to the Lord of Hatred to renew his servitude. As instructed by his master, countless human sacrifices were offered to the vile tentacle demon while he oversaw old and forbidden rituals with which to forge a new champion for the Prime Evil. The dark pawn was meticulously molded and finally bestowed with the title of Grand Inquisitor of the Triune. Two unwavering pillars to support the unrelenting restoration of the Cult of the Three now stood erect among the ruins of Kurast.
Strategy
The Inquisitor is an enemy who deals significant poison damage and reduces your potion effectiveness significantly. Instead to replenish your life, attack the Diseased Bloodsuckers
which come out of the Infested Regrowth or leech off the Thonos tentacles by the edges of the map.
Reward
Defeat Inquisitor of the Triune on Hell difficulty to get a Signet of Skill. You can use it once per character to gain 2 skill points.
DIFFICULTY: MODERATE
Bull Prince Rodeo
DIFFICULTY: MODERATE
Location
Corral of Corruption (The Secret Cow Level)
Lore
All Sanctuary's lifeforms are deeply interconnected by arcane "strings" of cause and effect invisible to most.
A powerul catalyst, the events of the 'Darkening of Tristram', stirred the magical forces permeating the Khanduras region, entangling in the arcane strings of causality two innocent creatures: a stormy bull named Rodeo and a mutilated boy called Wirt.
Where reality is but a precarious balance of esoteric powers, a loose stitch in its fabric was enough to unbind chaos... the souls and flesh of the two merged.
The newly formed being discovered to posses mystic potency with no equal in sight, pridefully took for himself the title of "King", then proceeded to mold numerous cow herds into faithful and conscious subjects.
King Wirt noticed that parts his old body, his wooden legs, had been transformed too, becoming artifacts able to access a pocked dimension.
Of this new dimension he made his kingdom and after years of reign, on his last day, he conceived an heir and branded him with a fitting name: Rodeo, the Bull Prince.
Strategy
Step further in this secret dimension, but be aware that Rodeo will consider you a false claimant to his throne and will attack you restlessly on sight.
Rodeo is very aggressive and has a stunning Hoof Stomp and the Blink spell, making it difficult to put some distance between you and him.
He can also call upon a Stampeding Herd of exploding cows that ploughs across the screen, trampling all in their path. This ability is unblockable, and will destroy you if you don't get out of the way in time.
But his most common spell, in cooperation with another victim of cruel farming practices, is a wave of chickens that will pursue their victim relentlessly, inflicting devastating damage with their beaks if they connect. The chickens can be dodged by staying mobile.
Reward
Defeat Bull Prince Rodeo on Hell difficulty to get the Fool's Gold.
Moo moo moo Moooo! Moo!
Required Level: 90
Keep in Inventory to Gain Bonus
+(0 to 38) to Strength
+(0 to 38) to Dexterity
+(0 to 38) to Vitality
+(0 to 38) to Energy
(11 to 15)% Bonus to Defense
-10% Gold Find
(16 to 20)% Magic Find
Killing Rodeo does not prevent you from entering the Cow Level again.
Rathma Square
DIFFICULTY: MODERATE
Location
Act 3: Caldeum
Kill the Stormtree at the Lower Kurast entrance to open a Portal to Caldeum.
Lore
Ensuing the Temple of the Triune's collapse, the Religion of the Light aimed to rigorously crush all of its remnants. A Peace Warder escaped from the downfall of the cult he blindly vowed to serve and sought refuge into the forgotten complex underneath the city of Kurast. Centuries ago, when the city was the center of civilization and black magic was not yet frowned upon, this was where the priests of Rathma practiced their arts. The area was abandoned once the Order of Zakarum took over the region and banned Dark Arts, hence making it the ideal hiding place for an evil bent on eradicating the Church of Light. Ambitions of restoring the Triune back to its standings started to take form whithin the exiled, so he assumed the role reserved to the highest position of the nefarious cult and proclaimed himself Primus. To this day, in the arcane undergrounds, gorging on the dark rituals of Mephisto's chosen, the Primus is relentlessly gaining formidable strength.
Strategy
Primus himself is not particularly hard, despite his powerful ranged Bladestorm attack. The blades track
your position, but do less damage than his normal attack and can be avoided, blocked and dodged. His
guard dogs are the real challenge. After several millennia in and around Rathma Square, his Gore Crawlers
can raise themselves from the dead. Shattering the corpse does not stop this, but the resurrection takes
10 seconds, during which you can attempt to run away and ditch them.
Reward
On Hell difficulty, Primus drops the Spirit Trance Herb.
Required Level: 90
Keep in Inventory to Gain Bonus
10% Attack Speed
10% Cast Speed
(21 to 150)% Bonus to Attack Rating
+(10 to 25) Life Regenerated per Second
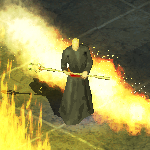
Black Road
DIFFICULTY: MODERATE
Location
Church of Dien-Ap-Sten (Act 1: Bramwell - Rogue Encampment)
Lore
The now former acolyte of the Zakarum-priesthood, Buyard Cholik, facing the limits of his own mortality, slowly started despising the so called "Religion of the Light", regretting all the years he faithfully devoted to the Zakarum order which was now exposing all of its frailty while confronting the wicked machinations of the Lord of Hatred. Eventually Buyard Cholik, fueled by an evergrowing thirst for knowledge related to the pursuit of eternal life, came to know about the mighty demon Kabraxis the Thief of Hope. Inebriated by the promise of immortality, the former Zakarum priest became an anchor for the banished demon between his prison realm and the mortal plane. Buyard Cholik thus started preparing Sanctuary for Kabraxis' arrival by establishing a new cult dedicated to the prophet Dien-Ap-Sten, the Thief of Hope in disguise. He wore the title of "Wayfinder" for his followers and founded, in the ancient city of Bramwell, the first church of the Way of Dreams, from where he plans to extend his foul influence on the whole region.
Strategy
Buyard is a primarily fire based caster whose Ultimate skill is the ability to summon a horde of possessed cultists to swarm you.
To damage Buyard, he must be in the fire circle in the middle of his room, but beware of one of his attacks that makes that circle treacherous to enter.
Reward
Killing Buyard Cholik gives you The Black Road charm which allows you to unlock your Black Road skill.
Required Level: 90
Keep in Inventory to Gain Bonus
Unlocks your Black Road Skill
+150 to Life
+75 to Mana
Your free bonus skill
When you complete this quest, keep the charm in your inventory. This allows you to put skill points into one of your skills in the Reward skill tab.
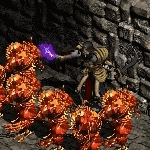
Legacy of Blood
DIFFICULTY: MODERATE
Location
Chamber of Blood (Torajan Jungles)
Lore
Bartuc, known as the Warlord of Blood, was once brother to Horazon and also a revered member of the Vizjerei mage clan. Whereas Horazon wanted to summon demons to enslave them, Bartuc chose to worship the spawns of Hell and traded his soul for demonic power. Their conflict eventually led to a civil war that shattered the mage clan. Although the Warlord of Blood was eventually destroyed by the very powers he sought to control, his soul and abilities have been claimed by the forces of Hell. With the Prime Evils on the march, it might be possible to find Bartuc's spirit in the ancient crypt where his cursed armour was buried...
Strategy
Bartuc and his summoned Blood Golems have ranged attacks and can hurt a lot in this tiny room. Protected
by the power of his cursed armour, Bartuc and his golems are invulnerable to damage. However, his
Wychwind blade throw requires him to concentrate on the spell and drop his resistances for a brief
time, and his dimwitted golems may briefly forget to shield themselves when they successfully hit
you and are distracted by your suffering.
Reward
Defeat Bartuc on Hell difficulty to get the Legacy of Blood.
By Richard Knaak
Required Level: 90
Keep in Inventory to Gain Bonus
Unlocks Mastery Skill: Endurance
(3 to 5)% Life stolen per Hit
(3 to 5)% Mana stolen per Hit
6% chance to drop a trophy fragment on Hell difficulty.
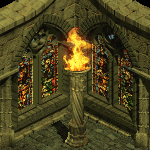
The Veiled Prophet
DIFFICULTY: MODERATE
LOCKDOWN: 30 seconds
Location
Cathedral of Vanity (Library of Fate)
Lore
Angels and Demons, opposing sides of the same coin, locked in a never ending tug of war. One day, however, that coin briefly landed on its edge...
The archangel Inarius and the demoness Lilith had long awaited an opportunity to break the shackles binding them to the Eternal Conflict and, when the rebel seraphim stumbled upon the Worldstone, fulcrum for the shaping of reality, time was ripe.
The two lovers hid it from their kin and with it forged Sanctuary, a refuge and eventually home to their offspring, the nephalem.
Their weak human descendants retained the latent potential of their ancestors and, through magic arts, one day experimented with the summoning of demons.
These acts brought Sanctuary's presence under the observant eyes of the Prime Evils, whom promptly established the Cult of the Triune with intent of subjugating humanity under their rule.
Inarius, to ward off their influence, created the Cathedral of Light, upholding the tenets of Heaven. This ignited the start of the Sin War, culminated with the confinement of Inarius in the Burning Hells under Mephisto's keep.
The Lord of Hatred, after centuries of torment, managed to bend Inarius' spirit, collecting a new pawn for his schemes.
Strategy
The fallen angel lies in wait, revered by a host of deadly nuns and concealed by the Crystal Ball, linchpin of the cathedral’s magical defenses.
The tower exudes a wicked invulnerability shield to protect nearby revelers and casts searing beams of arcane lightning that destroys anything they touch.
Destroy the Crystal Ball to dispel the immortality from the other enemies and reveal Inarius' presence.
Reward
Defeat The Prophet on Hell difficulty to get the Idol of Vanity.
Required Level: 90
Keep in Inventory to Gain Bonus
Unlocks Mastery Skill: Continuity
15% Combat Speeds
6% chance to drop a trophy fragment on Hell difficulty.
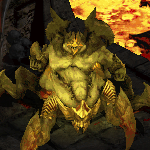
Heart of Sin
DIFFICULTY: MODERATE
Location
Realm of Sin (Act 4: Chaos Sanctuary)
Kill Ghom to obtain a Key of Sin, right click it to open a portal to the Realm of Sin.
Lore
One of the Great Evils, Azmodan, the Lord of Sin, has commenced once again to rise an army in the shadows of Hell.
In ages past, joined by his brother Belial, he united and led the other Lesser Evils in a demonic civil war across the Burning Hells where a new rule, his rule, would then begin.
He succeeded into snatching the seat of power from the Prime Evils banishing them to Sanctuary and marking an event known as the "Dark Exile".
On the Mortal Realm the weakened Prime Evils were hunted by various individuals from several Mage Clans and were conclusively trapped inside the soulstones, posing no threat of retaliation towards the usurper.
History repeats itself and, moved by the ever burning desire for conquest, Azmodan sets now sight on Sanctuary...
One of his most devoted lieutenant, Ghom the Lord of Gluttony, carries the key to reach his domain. It's imperative to find and stop him on before it's too late.
Strategy
Azmodan is accompanied by a legion of Balrogs that cast Fire Fountain and Ravening Beasts which unleash molten boulders.
High maximum fire resistance will help against these threats, but not as much as against Azmodan himself.
Though he uses Flamestrike, it is very strong even against high fire resistance. And as for an attack that's not fire damage based, he will cast Fortress
which can subdue his ranged attackers. Movement here is key.
Reward
Defeat Azmodan on Hell difficulty to get Azmodan's Heart.
Required Level: 90
Keep in Inventory to Gain Bonus
Maximum Elemental Resists +2%
Elemental Resists +(11 to 20)%
-5% to All Vendor Prices
6% chance to drop a trophy fragment on Hell difficulty.
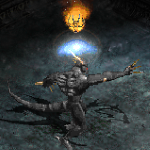
Invasion II
DIFFICULTY: MODERATE
LOCKDOWN: 20 seconds
Complete the Invasion dungeon quest before attempting this.
Location
The Storm Cave (Act 4: Chaos Sanctuary - Realm of Sin)
Lore
The strange Riftwalker that appeared amidst the secluded dunes of the Aranoch lands was in reality only the harbinger of more inexplicable incursions. In the depths of the Burning Hells near the core of Azmodan's realm, the pretender to the Prime Evils' thrones, a crimson portal pierces the scorching wastes. There lies in wait a second invader, wielding even more power than its predecessor. Transfiguring the fiery landscape into a frozen lair, the Greater Riftwalker stands in defiance of the demonic hordes and moves a step forward this cataclysmic invasion looming from the beyond.
Reward
Defeat the Greater Riftwalker to get the Greater Riftwalker Essence, and upgrade the Riftwalker's Eye with it.
This upgrade recipe adds the following bonuses:
Bonus quest
Defeat the Greater Riftwalker without taking damage from the Rift Storm.
Upon completion upgrade your Riftwalker's Eye.
This upgrade recipe adds the following bonuses:
DIFFICULTY: HARD
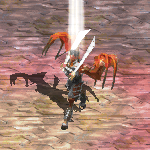
Judgement Day
DIFFICULTY: HARD
LOCKDOWN: 30 seconds
Locations
Crystal Arch (Act 4: Silver Spire Level 2)
Halls of Valor (Imperius)
Pools of Wisdom (Malthael)
Kill Izual to open a Portal to the Diamond Gates and find your way to the Silver City. Therein lies the entrance to
the first level of the Silver Spire.
Lore
The Lord of Terror demonic essence, covertly invited into the High Heavens by the fallen seraphim Izual, has slithered into the chambers of the Angiris Council affecting two of its members.
The tainting presence twisted Imperius' mind, reigniting the smoldering ashes of an old disdain the Archangel of Valor felt towards humans, abominations delivered by the sacrilegious union between angels and demons.
Malthael's volition was instead vanquished when his mind was caged and plunged into delirium while forcing the Archangel of Wisdom to perpetually confront the unfathomable mysteries of life and death.
In the divine planes the two seraphims have then conjured and enslaved the spirits of the legendary Edyrem, obtaining several immortal protectors.
The defiled souls of the archangels are mutely screaming their outrage. Purge them from the corruption by destroying their material avatars.
Strategy
Once in the Crystal Arch, both locations to find Imperius and Malthael are generated.
Both avatars posess considerable might and fighting them while fending off from their immortal guardians might result fatal. Try to lure the Fallen Edyrem away and then teleport in reach of the archangels.
Reward
Defeat Imperius or Malthael on Hell difficulty to get the Crystalline Flame Medallion.
Required Level: 90
Keep in Inventory to Gain Bonus
+1 to Summon Edyrem
Fire Absorb 5%
Lightning Absorb 5%
Cold Absorb 5%
Cube after Killing Imperius and Malthael
(Max: 1 minute from each other)
4% chance to drop a trophy fragment on Hell difficulty.
Bonus quest
If you are exceptionally daring or suicidal, destroy them both within 60 seconds, then transmute
the Medallion in the cube to upgrade it.
This upgrade recipe adds the following bonuses:
+40 to All Attributes
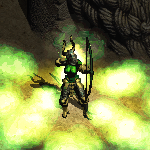
Twin Seas
DIFFICULTY: HARD
Location
Island of Skartara (Tran Athulua)
Kill Kethryes in the Halls of the Dead to open a portal to Tran Athulua and navigate to the Island.
Waypoint
Once at the island, use an Askari Scroll dropped by one of the Priestesses in Tran Athulua to summon her in the center
of the island.
Lore
Athulua is the prime deity of the Amazon people. With her consort, Kethryes, she rules over the seasons
and the weather. The Amazon capital, Tran Athulua, is named so in her honour. Athulua is responsible
for some of the most mysterious powers in an Amazon's arsenal. When a warrior has proven her devotion
to Athulua through her brave deeds and exceptional skill in battle, the Goddess shows her favour by granting
a spiritual emissary to aid the Amazon. These emissaries of Athulua are called Valkyrie, and they are
the spirits of the greatest heroes from the Amazon people. The power to summon a Valkyrie is the greatest
honour that an Amazon warrior can receive. It is believed this gift is a sign that your place beside
the Goddess is assured when you pass from this world-perhaps even as a Valkyrie.
Strategy
You can find the Amazon Goddess at the heart of the ruins. Her bow attacks deal heavy physical damage
- make sure to avoid her Tantrum ability up close and her stunning Guided Arrows or you will become trapped
in her kill zone. She will summon killable rat minions, which chase you down and cast Tremor on death.
Kill them from a distance so as to not get hit by this spell, which reduces your life significantly.
Her other attack is Sky Siege. This teleports her to your location creating a large dust cloud, which
deals heavy physical damage over time. Be sure to leave its area of effect as soon as you can.
Reward
Defeat Athulua, the Amazonian Godess on Hell difficulty to get the Weather Control. Additionally, Athulua
has a 20% chance to spawn Deity's
Bow.
15% chance to drop a Tran Athulua trophy fragment on Hell difficulty.
Required Level: 90
Keep in Inventory to Gain Bonus
Jitan's Gate Cooldown Reduced by 1 seconds
(2 to 5)% Innate Elemental Damage
+10 to all Attributes
Valkyrie's Prime
The use of the Deity's Bow is to possibly assemble it into a mighty
bow -
Valkyrie's Prime. This process is very difficult because of all the
rare emblems required to craft the bow. You will need all 6 of them, which can drop from regular
monsters.
It assembles the mighty Amazon bow invested with powers from Athulua herself.
Two-Hand Damage: (245 - 264) to (362 - 385)
Required Level: 110
Required Strength: 666
Required Dexterity: 666
Item Level: 105
Dexterity Damage Bonus: (0.15 per Dexterity)%
Strength Damage Bonus: (0.15 per Strength)%
100% Chance to cast level 1 Athulua's Wrath when you Die
35% Chance to cast level 15 Arrow on Striking
+(1 to 4) to All Skills
Adds 150-250 Damage
Ignore Target's Defense
+(151 to 200)% Enhanced Damage
+10 to Sky Siege
Maximum Elemental Resists +(0 to 2)%
- Athulua's Determination -
Socketed (6)

Quov Tsin
DIFFICULTY: HARD
Location
Vizjerei Temple (Caldeum)
Lore
Hungry for power and misled by Diablo, the irritable Vizjerei mage Quov Tsin set out to find Ureh, the fabled ancient city that had
supposedly ascended up to the Heavens. Aided by Kentril Dumon and his mercenary company, which included Gorst the infamous barbarian, they
succeeded in their task. However what they discovered within the deepest ruins of the grand city was no portal to Heaven, but a
twisted nightmare of horrors - the Kingdom of Shadow. They were never seen again. It is rumoured that their spirits still clings to reality
in a place they once called home, and that the ancient Vizjerei lies in waiting for a suitable mortal vessel that will allow him to rise once more.
Strategy
As a former Vizjerei in life, Quov Tsin wields the elements. His most devastating attack is a streaming
blast of fire, cold and lightning bolts powerful enough to annihilate any hero in a moment. He may cast the curse, Mythal,
to reduce your resistances. He also uses a bone nova at a distance.
Prepare for this battle by equipping resistance items, and try to find some absorb items to further cut the damage.
His contingency spells protect him by teleporting him to safety when struck by any attack. Staying near him will make you more resistant to his tri-elemental damage.
Reward
Defeat Quov Tsin on Hell difficulty to get the Silver Seal of Ureh.
Required Level: 90
Keep in Inventory to Gain Bonus
+1 to All Skills
+(21 to 30) Spell Focus
+(11 to 13)% to Summoned Minion Damage
+(11 to 15)% to Summoned Minion Resistances
+(11 to 20) to Strength
+(11 to 20) to Dexterity
+(11 to 20) to Vitality
+(11 to 20) to Energy
6% chance to drop a trophy fragment on Hell difficulty.
Kingdom of Shadow
DIFFICULTY: HARD
LOCKDOWN: 20 seconds
Location
Ruins of Ureh (Vizjerei Temple - Caldeum)
Lore
Ureh, the mythical golden city which firmly stood against the sieging legions of Diablo, ultimately ascending to Heavens. The lost truth, although, whispers of a brutal catastrophe...
Among the powerful sorcerers tasked with the protection during the siege, a traitor was hiding: the devout Juris Khan, ruler of the city.
The conspirer subtley hindered all the defenders' warding spells, allowing for Hell's corruption to seep in and crush hope in the hearts of Ureh's inhabitants.
In a desperate effort, the sorcerers sought to transport the inner city to a safe location behind the mountains, but, yet again, the incantation was disrupted.
Once casted, the ungoverned teleportation spell fed on the ominous energies surging from the infernal host encasing Ureh, and hurled the city to the Limbo Realm, between the mortal plane and the Burning Hells.
Juris Khan's rule over the stranded ruins did not end. He transfigured his survived former subjects into immortal thralls, slaves to his whims, and has begun consolidating power to anchor the dark ruins back to Sanctuary.
Enemies
The ghostly citizens are impossible to kill, but they are more than capable of killing you. Keep
moving at all costs to avoid the undead hordes.
Bosses
The plazas of Ureh are huge, the lighting is very dim and the mad King Juris
Khan is located at the end of a precarious bridge to oblivion. Please run around like a damsel in
a zombie film until you find the narrow ledge leading to the king. Juris Khan brings more minions
from beyond the grave, finish him quickly.
Reward
Defeat Juris Khan on Hell difficulty to get the Eternal Bone Pile.
Required Level: 90
Keep in Inventory to Gain Bonus
+(1 to 2) to Sorceress Skill Levels
+(1 to 2) to Paladin Skill Levels
+(1 to 2) to Necromancer Skill Levels
+(1 to 2) to Druid Skill Levels
+(1 to 2) to Barbarian Skill Levels
+(1 to 2) to Assassin Skill Levels
+(1 to 2) to Amazon Skill Levels
10% Movement Speed
8% chance to drop a trophy fragment on Hell difficulty.
Banisher of Light
DIFFICULTY: HARD
Location
The Path to Enlightenment (Bramwell → Church of Dien-Ap-Sten)
Kill Buyard Cholik and open a portal to the Path to Enlightenment.
Lore
One of the darkest shadow to have ever been cast on the history of Sanctuary was that of Kabraxis, the Thief of Hope.
Known also as the Banisher of Light, the mighty demon lord was first summoned in the far past by a very powerful Vizjerei magi. He used his intelligence and power to form a cult and rule the lands subjugating its inhabitants.
People followed his philosophy, committing atrocities in his name, believing to act in accordance to what they called the "Shadow Self", their true nature.
Few chosen walked also what was referred to as "The Black Road", or "Path to Enlightenment", ultimately sacrificing themselves by becoming Kabraxis' vessels, gifting him flesh for his spirit to walk on the Mortal Realm. Soon his power grew so much that even the Prime Evils feared him.
Considering him a threat, they imprisoned the demon lord within the portal he came from, between Sanctuary and the Burning Hells, sealing the pathway to his return and blind ambitions under a pillar made of his followers' skulls.
Strategy
Once you destroy the Pillar of Skulls, Kabraxis will be released. He is of extremely aggressive nature: will pounce on you with various AOE attacks, summon an additional Shadow Self horde of followers and cast Balefire or teleport when hit.
Your best approach would probably consist in keep running while killing his minions as fast as you can, and avoiding to stand too close to Kabraxis all the time, after all he will probably close the distance quite often.
Reward
Defeat Kabraxis, Thief of Hope on Hell difficulty to get the Soul of Kabraxis.
Required Level: 90
Keep in Inventory to Gain Bonus
+1 to All Skills
Maximum Fire Resist +(1 to 3)%
Maximum Lightning Resist +(1 to 3)%
Maximum Cold Resist +(1 to 3)%
Maximum Poison Resist +(1 to 3)%
6% chance to drop a trophy fragment on Hell difficulty.
Bonus quest
Rumors tell of five additional beings sealed in that same hellish plane...
In the aftermath of the Mage Clan Wars, the Vizjerei Clan resolved to eternally reject demonic magic and focused their studies on the elements.
To further uphold this pledge, the Order of the Mage Slayers, Viz-Jaq'taar, was instituted, with instructions to dispose of any internal dissent.
These measures, however, planted the seed of distrust between the Vizjerei, whom now feared death as response to their most daring experiments, leading many to relinquish the Clan.
After years of studies, five of these deserters were able to conjure exceptionally powerful spiritual manifestations of magical aspects residing in a remote forest, and named them accordingly.
Eager to exact revenge over demonkind, the arrogant mages merged their souls into the conjured manifestations and started their crusade. Little is known about the events that unfolded but one thing, they lost.
Each Spirit, once defeated, will drop a token of its nature. Transmute all five with The Black Road charm to deepen its potential.
This upgrade recipe adds the following bonuses:
Legion of the Damned
DIFFICULTY: HARD
Location
Obtain Call of the Damned scroll on Hell difficulty to open the portal
Lore
During the Darkening of Tristram, King Leoric murdered one of his court mages, Manoruk. Now, someone resurrected him to invade the living with his legions of summoned undead.
Strategy
Defeat multiple waves of undead enemies to stop the necromancer's invasion.
Drop Bias
Enemies from waves reward you with lots of items and experience.
Reward
Obtain Bone Chimes by defeating all waves and Manoruk. It can enhance many desirable stats for your character based on your other equipment.
Bonus Quest
If you want even more and better rewards you can modify the quest battle, with greater difficulty giving better rewards.
Toraja
REQUIRED LEVEL: 120
DIFFICULTY: HARD
Location
Act 3: Torajan Cemetery (Torajan Jungles)
Lore
Behind the rusted fences of the desolate Torajan Cemetery lies a sealed rift portal, gateway to a perilous ancient time overlooking the bane of the great city of Toraja.
In remote times, these overgrown charred ruins were sculpted in legends as the place where the nephalem Uldyssian led his Edyrem to spearhead the uprising against the infernal Cult of the Triune.
This battle is where the time rift leads you. Aid the Edyrem in their confrontation against Lilith, Queen of the Succubi, and the Triune’s demonic cultists at her following.
Strategy
Because you are not directly allowed to interfere with the flow of time, you cannot damage the enemies
at all. Bring the
Crystalline Flame Medaillion which you acquired during the Judgment Day uberquest
and use its special ability to summon a batallion of edyrem, fighter-mages who have the ability to dispel
the immortality wards off the enemies. Although they are vulnerable to the supernatural onslaught of
the Triune, they have the power to cast an invulnerability shield of their own, allowing them to close
in and remove the immunities. Defend them well and lead your army of edyrem to victory!
Reward
Defeat Lilith on Hell difficulty to get Lylia's Curse.
Required Level: 120
Keep in Inventory to Gain Bonus
+(11 to 25)% Bonus to Summoned Edyrem Life
+20 Life Regenerated per Second
Maximum Cold Resist +1%
Elemental Resists +10%
The Mirror Temple
DIFFICULTY: HARD
Location
Act 2: The Island of Skartara (Tran Athulua)
Lore
The tombs on the Island of Skartara have finally opened!
Strategy
Navigate the mazes of Mirror Temple to find the Nemesis miniboss and defeat them to receive an upgrade to your class charm.
Reward
Defeat Nemesis on Hell difficulty to receive Mirror of Shadows.
DIFFICULTY: VERY HARD
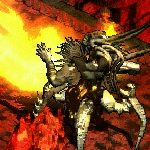
Eve of Destruction
REQUIRED LEVEL: 110
DIFFICULTY: VERY HARD
LOCKDOWN: 20 minutes
Location
Act 5: The Worldstone Chamber
Lore
Much is known about Tor'Baalos, more commonly referred to as Baal, the Lord of Destruction: his battles during the Great Conflict, his bloodlust during the Sin Wars and his lust for revenge following the Dark Exile. Now all of the strife, devastation and horror he had wrought through the ages has been channeled into the Worldstone. He seeks to reveal Sanctuary to the searing gaze of the Burning Hells and violate it with the demonic legions' onslaught. The mortal realm won't be able to endure Baal's intolerable force for long, and then even the Heavens will crumble. You must stop him before it's too late!
Strategy
The Lord of Destruction prefers fighting in close quarters where his spells will be harder to dodge. Heroes which attempt to flee
or hide behind walls will be punished for their cowardice. "Defile", his most dangerous ability, marks an area on the ground in pulsating
darkness which explodes after a few seconds dealing heavy magic damage. Also Baal will often incinerate all mana from your hero with his
"Inferno"; so having a way to recover it quickly is recommended. The Lord of Destruction may call on his minions to aid him in battle,
which buff their master and so must be killed quickly. He may also rarely haunt your hero with "Visions of Evil" which inhibit your
Nephalem powers and thus render him untouchable; free yourself of these evils as fast as you can, lest you be overwhelmed into madness.
Your best chance of defeating Baal lies in staying on your feet; but beware, the larger your party the more horrors will rise up to defend their master.
Reward
Defeat Baal on Hell difficulty to get the Spirit of Creation charm. The first time you defeat him you will also gain a Relic.
Required Level: 90
Keep in Inventory to Gain Bonus
Unlocks Mastery Skill: Specialization
+25 to Strength
Maximum Mana +(1 to 5)%
Regenerate Mana +10%
Elemental Resists +(1 to 10)%
10% chance to drop a trophy fragment on Hell difficulty.
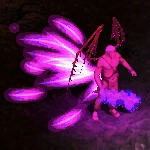
Lord of Lies
DIFFICULTY: VERY HARD
LOCKDOWN: 60 seconds
Location
Realm of Lies (Act 4: Chaos Sanctuary)
Kill Maghda to obtain a Key of Lies, right click it to open a portal to the Realm of Lies.
Lore
After the Lesser Evils secured control over the Burning Hells, Azmodan, the new de facto leader, saw into consolidating his position by eroding Belial's.
The Lord of Lies felt betrayed and, with his anger and resentment, he openly opposed to his brother's reign, hoping to gain consensus amongst the hellish legions.
Fearing Azmodan's fury, only few gathered to Belial side, and the short lived feud was drowned in their blood.
The Lord of Lies was banished to Sanctuary and found refuge in an icy cave under Harrogath, offering both him and his servants proximity to the powerful Worldstone.
There, undisturbed, he schemes of conquering humanity to use them as pawns to overthrow his brother. It is wisphered that his loyal attendant, the Coven's witch Maghda, acquired the means to reach her master.
Strategy
As the Lord of Lies, Belial prefers to cheat in battle. His main offence consists of his clones which will keep him safe as he cowardly hides. Belial will use a powerful Comet spell, and continue to confuse you by summoning new copies. You will need fast killing speed or you will be overwhelmed by his minions.
Reward
Defeat Belial on Hell difficulty to get the Book of Lies.
Required Level: 90
Keep in Inventory to Gain Bonus
+(100 to 500) to Life
+(50 to 250) to Mana
6% chance to drop a trophy fragment on Hell difficulty.
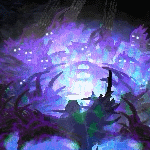
Ghosts of Old Bremmtown
REQUIRED LEVEL: 125
DIFFICULTY: VERY HARD
Location
Act 5: Bremmtown (portal on a path on the right edge of Fauztinville)
Lore
17,938 years after the the Fauz-Tin Clan's extermination brought mankind closer to demonkind, humanity bled into nothingness like a flickering candle held against oblivion.
Where the proud Fauztinville once stood now lies Bremmtown, the last colony during the fading of civilization. Inarius, eons prior, attuned the Worldstone to endlessly wane the nephalem's might with each generation, giving rise across time to humanity.
In this reality, a Blood Mages Clan of Bartuc's lineage was able to avert the Worldstone's corruption and consequent destruction, unknowingly sealing men's nature to the relentless chains forged by the rogue angel.
Several millennia later, armed with scraps of knowledge, the fragile descendants of those once known as Necromancers felt to haven't yet outlived their usefulness...
They attempted to save their kin and reunite with the departed by fracturing the veil severing the Spirit Realm from the mortal plane, but were no longer able to deter the dark forces lurking beyond.
Sanctuary turned into a womb of enmity and decay and, as with the creation of the ancient guardian Trag'Oul, champion of Balance, a new guardian for the new world was conceived, the Dark Star Dragon, champion of Blight.
Strategy
Sensing your lifeforce the Howling Spirits materialize directly upon you enveloping the hero with the freezing coldness of death. You have no choice but to take some hits, avoid and defense become of vital importance.
The shadowy Dark Star Dragon summons additional Howling Spirits and cast a death beam that will make short work of you unless you seek cover as the beams pass by.
Reward
Defeat the Dark Star Dragon on Hell difficulty to get the Dragon Claw
Required Level: 125
Keep in Inventory to Gain Bonus
Unlocks Mastery Skill: Chemistry
+(100 to 150) to Life
+(50 to 75) to Mana
Cube after Killing Dark Star Dragon in Under 1 Minute and 30 Seconds
Bonus Quest
Defeat the Dark Star Dragon within 1 minute and 30 seconds after entering the level and without
dying. If you succeed, a single use cube recipe is available to upgrade its drop.
You only have 30 seconds after killing the Dark Star Dragon to use the recipe.
This upgrade recipe adds the following bonuses:
Amazon:(Amazon Only)
+500 to Life
Assassin:
(Assassin Only)
Maximum Life +5%
Barbarian:
(Barbarian Only)
Weapon Physical Damage +30%
Druid:
(Druid Only)
+1000 Defense
Necromancer:
(Necromancer Only)
Physical Resist 5%
Paladin:
(Paladin Only)
5% Chance to Avoid Damage
Sorceress:
(Sorceress Only)
+50 Spell Focus
6% chance to drop a trophy fragment on Hell difficulty. To apply the trophy for a small bonus, kill the the Dark Star Dragon within 30 seconds of entering the quest and cube the trophy with the charm.
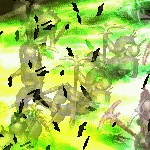
Yshari Sanctum
DIFFICULTY: VERY HARD
LOCKDOWN: 12 minutes
Locations
Specter of Hatred (Caldeum)
Dream of Anguish
Phantasm of Terror
Figment of Pain
Snare of Destruction
Yshari Sanctum (Caldeum)
Reaching any zone will create a portal to the previous zone.
Lore
The Sanctum was created at the behest of the Trade Consortium Council of Caldeum, seeking to unite the Mage Clans and make Kehjistan's new capital a beacon of civilization.
The academy came to be filled with treasure troves of arcana, becoming a place of learning and growth, and was lead by the famous Archmage Valthek.
Recently, defiance has pervaded the academy: numerous students have left due to dissent from the methods and forbidden arts promulgated by the Archmage.
Like with the High Council of Zakarum, Mephisto's malevolence steadily enslaved the mind of Valthek, turning the mightiest mage of Sanctuary into a minister of hatred.
Two of his most gifted disciples, noticing the subtle changes in their master, informed the Council and were tasked by the mercantile rulers to craft a set, that once donned, would have allowed the wearer to endure a confrontation against the Archmage.
But, Valthek struck first. He cast away the set pieces and distorted the Yshari Sanctum into a hellish maze.
Strategy
Each sector of the colossal maze will be inhabited by one of the Archmage's most loyal scholars which will be
guarding 2 set pieces: One of the Brotherhood of the Vizjerei and one of the Horadrim.
You need these full sets in order to be able to fight Valthek. While wearing the two sets simultaneously,
you will acquire new powerful skills which are required to defeat the Archmage.You must act before the whole of Caldeum is overrun with evil.
Reward
Defeat Valthek, the Vizjerei Sorcerer on Hell difficulty to get The Ancient Repositories.
Required Level: 90
Keep in Inventory to Gain Bonus
+(0 to 1) to All Skills
(101 to 150)% Bonus to Attack Rating
+(11 to 15)% to Spell Damage
(6 to 10)% Chance of Crushing Blow
Fire Resist +(5 to 20)%
Lightning Resist +(5 to 20)%
Cold Resist +(5 to 20)%
6% chance to drop a trophy fragment on Hell difficulty.
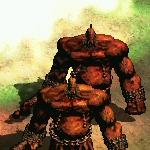
Xazax
DIFFICULTY: VERY HARD
LOCKDOWN: 5 minutes
Location
Wretched Sands (Island of Skartara)
Lore
In the aftermath of the civil war in the Burning Hells, when Belial was exiled, the loyal servant Xazax founded himself stranded on Sanctuary vainly aiming to discover his master location.
When his search brought him in the Aranorch wastelands, he perceived the presence of the Lord of Terror within the Dark Wanderer advancing towards Lut Gholein.
Dishearten and horrified he fell into despair, believing Diablo to be on the hunt for him to exact revenge for Belial's transgressions.
Paranoid with fear, he called upon his demonic cohorts to provide protection and fled to the Island of Skartara.
Find Xazax and put an end to this dark summoning, lest in his madness he turns his followers against the Skovos Isles.
Strategy
Xazax is attempting to open a portal to Hell and invade Sanctuary with his minions, so the
faster you can bring him down the better as you will have to deal with less of his hellish hordes
which are invulnerable to mortals. This will not be easy however for you will be bombarded by
Hellfire and choked in corrosive venom if you do not react quickly. Beware his Glacial Nova attack which
can slow you down and make you more vulnerable to his Pentients.
Reward
Defeat Xazax on Hell difficulty to get Xazax's Illusion charm
and a Book Of Cain.
Required Level: 90
Keep in Inventory to Gain Bonus
+(0 to 2) to Necromancer Skill Levels
+(0 to 2) to Paladin Skill Levels
+(0 to 2) to Sorceress Skill Levels
+(0 to 2) to Barbarian Skill Levels
+(0 to 2) to Druid Skill Levels
+(0 to 2) to Amazon Skill Levels
+(0 to 2) to Assassin Skill Levels
+(10 to 25) Life Regenerated per Second
Poison Resist +(26 to 50)%
The Book Of Cain can be used as a reagent for a powerful recipe.
6% chance to drop a trophy fragment on Hell difficulty.
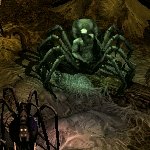
Astrogha
DIFFICULTY: VERY HARD
Location
Web of Deceit (Torajan Jungles)
Lore
Lord Aldric Jitan has been crushed, but in his final breath he uttered the incantation to conclude the summoning ritual: Astrogha, the paragon of deceit, has come. The mischievous demon has found shelter in the dark recesses beneath the earth, festering the uderground with his webs and cocoons and bursting forth like a fetid tide his crawling servants. The demonic spider is already conniving for the sake of Diablo's reign of terror. Venture in the crooked halls of the underground cave and do not let his dreadful visage deters your resolve, he must be struck down. Be cautious... Astrogha is never alone.
Strategy
Astrogha does not usually fight his foes directly, but he does not need to. His summoned Spider Statues serve as gateways for his personal swarm, belching waves of crawling Darklings from the depths of the Black Abyss.
Deal with them quickly, but do not touch the statues! They are protected by one of Astrogha's devious tricks: when destroyed, they will both rejuvenate Astrogha and unleash a curse that cripples the assailant.
If left alone, they will eventually collapse on their own. Astrogha also possesses a very powerful but close-ranged Frozen Orb attack and warding spells that teleport him away when damaged.
Reward
Defeat Astrogha on Hell difficulty to get Astrogha's Venom Stinger.
Required Level: 90
Keep in Inventory to Gain Bonus
+1 to All Skills
Jitan's Gate Cooldown Reduced by 1 seconds
+(200 to 500) to Life
Poison Length Reduced by 50%
6% chance to drop a trophy fragment on Hell difficulty.
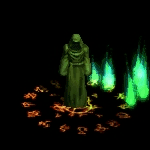
Nymyr's Light
DIFFICULTY: VERY HARD
LOCKDOWN: 90 seconds
Location
Kingdom of Shadow (Ruins of Ureh)
Lore
The betrayal that condemned Ureh wore also the visage of Juris's daughter, Atanna Khan.
The golden city protection was entrusted not only to the fortified high-walls or the sorcerers within, but also to the impervious Mount Nymyr embracing Ureh from the North.
It was there where the mage Atanna was positioned during the siege, tasked by her father to guide the scouts of Diablo's legion across a hidden path to the unguarded northern walls. But her too fell victim to the unexpected events of that day.
Despite being on Nymyr's pass, she was reached and entangled by the unruly spell's light and violently traversed the Limbo dimension.
Atanna was cast in the deepest plane of the esoteric realm, stranded in an endless black mire where the dimensional planes themselves are born: the obscure World Nexus.
To climb unhindered between the planes to join her father in Ureh, she entered in an inmost sleep state in which she manifested figments of her psyche in the form of lost travelers, probing possible pathways, and as ethereal projections of herself guarding her slumber.
Reward
Defeat Atanna Khan on Hell difficulty to get the The Sleep.
Required Level: 90
Cube with Trophy to Awaken
Disenchant to open a portal to the World Nexus
Keep in Inventory to Gain Bonus
Maximum Fire Resist +(0 to 1)%
Maximum Lightning Resist +(0 to 1)%
Maximum Cold Resist +(0 to 1)%
Maximum Poison Resist +(0 to 1)%
This charm allows you to add a powerful enchantment to it by transmuting it with any one of the 20 existing trophies. Each trophy adds an unique bonus, but only one trophy can be applied, only once, so choose carefully.
This upgrade recipe adds the following bonuses:
|
Lord of Lies Trophy +250 to Life +250 to Mana 50% Gold Find -20% to All Vendor Prices |
Legacy of Blood Trophy 20% Life stolen per Hit 20% Mana stolen per Hit +25 to all Attributes |
|
Judgement Day Trophy +50% to Summoned Minion Life +25% to Summoned Minion Damage +20% to Summoned Minion Resistances |
Yshari Sanctum Trophy +25% to Spell Damage +20 to all Attributes Maximum Mana +10% |
|
Kingdom of Shadow Trophy 20% Movement Speed 50% Block Speed 50% Hit Recovery |
Duncraig Trophy +60% Damage to Demons +60% Damage to Undead +75 Life on Melee Attack +75 Mana on Melee Attack |
|
Xazax Trophy 10% Chance of Crushing Blow Poison Length Reduced by 25% 50% Magic Find |
The Veiled Prophet Trophy +50 Spell Focus +5% Bonus to Spell Focus +50 to Energy |
|
Tran Athulua Trophy 100% Bonus to Attack Rating +750 to Attack Rating Physical Damage Reduced by 50 |
Quov Tsin Trophy +20% Bonus Elemental Damage to Bloodlust Elemental Resists +20% Elemental/Magic Damage Reduced by 20 |
|
Astrogha Trophy +2 to All Skills Slow Target 20% 30% Curse Length Reduction |
Heart of Sin Trophy +100 Life Regenerated per Second Maximum Life +5% Cannot Be Frozen |
|
Viz-jun Trophy +500 Defense Physical Resist 5% 50% Bonus to Defense |
Archbishop Lazarus Trophy 50% Combat Speeds Maximum Life +5% |
|
The Triune Trophy Adds 10-20 Damage 10% to All Attributes |
Nephalem's Sacrifice Trophy 15% Innate Elemental Damage 10% to All Attributes |
|
Banisher of Light Trophy -15% to Enemy Elemental Resistances +10 Maximum Stamina |
Ghosts of Old Bremmtown Trophy 10% Movement Speed 5% Chance to Avoid Damage |
|
The Void Trophy 1% Base Block Chance Teleport Cooldown Reduced by 0.5 seconds +5 to Light Radius |
Eve of Destruction Trophy Weapon Physical Damage +40% Regenerate Mana +50% +10% to Experience Gained |
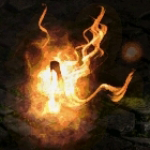
Spirit World
REQUIRED LEVEL: 125
DIFFICULTY: VERY HARD
LOCKDOWN: 5 minutes
Location
Mbwiru Eikura (Act 3: Teganze)
Lore
Mbwiru Eikura, also know as the "Spirit World" or "Unformed Land", is the central tenet of Umbaru's beliefs. They consider the Mortal Realm merely an illusion concealing the Spirit World, true plane of reality.
It is from there that the Umbaru draw their powers, and it is there where Giyua, guardian of the realm, reside as one of the gods. Its nature is not entirely known, but Umbaru priests have concluded that in Mbwiru Eikura dwell numerous wrathful spirits.
Umbaru's mythology establishes that every living being shares a 'filament', connecting them to the Unformed Land and transcending the mortal illusion.
Is it then possible for these bridges to have been tainted by the spreading malice of Diablo and his brethren, granting them a pathway to Mbwiru Eikura?
Strategy
Spirit of Giyua will pounce on you as soon as he sees you. This triggers off a devastating six-directional projectile
spell which is countered by staying in his melee range. He may also invoke a devastating fiery explosion which has a slow charge up time, be sure to move out of the blast centre. His last ability is to spawn nests.
These summon untargetable, high physical and fire damage dealing minions whose job is to get you on the run, hence making you susceptible to the above spells. These nests will also make Giyua invulnerable until destroyed.
Reward
Defeat the Spirit of Giyua on Hell difficulty to get a Ghost Trance. Cube it with your Umbaru Treasure for an added bonus.
This adds the following bonuses:
+(11 to 40) to all Attributes
Spirit of Giyua also can also drop Runestones.
DIFFICULTY: EXTREME
Invasion III
DIFFICULTY: EXTREME
LOCKDOWN: 20 seconds
Complete the Invasion dungeon quest before attempting this.
Location
The Storm Pit (Act 4: Chaos Sanctuary - Realm of Lies)
Lore
Once again a Riftwalker has bridged the inscrutable distances between the Mortal Plane and its esoteric dimension, anchoring its presence to Sanctuary. The arcane beacon that guided the dreadful invader was none other than that of Belial, the Lord of Lies. The Lesser Evil, exiled from the Burning Hells, now dwelled with his wicked servants in a cave beneath Harrogath, in the recesses of which a portal has opened. It leads to a gaping furnace where occult energies and boundless malice mingle to strengthen the Ascendant Riftwalker cruel determination.
Reward
Defeat the Ascendant Riftwalker to get the Depleted Riftstone (1), which you can use to access the Dimensional Labyrinth rift.
You also get an Ascendant Riftwalker Essence, which you can use to upgrade the Riftwalker's Eye.
This upgrade recipe adds the following bonuses:
Bonus quest
Defeat the Ascendant Riftwalker without taking damage from the Rift Storm and with at least one Frozen Shambler alive.
Upon completion upgrade your Riftwalker's Eye.
This upgrade recipe adds the following bonuses:
The Void
DIFFICULTY: EXTREME
LOCKDOWN: 8 minutes (3 minutes for zones before it)
Locations
Black Abyss
Plane of Sloth
Plane of Gluttony
Plane of Greed
Plane of Lust
Plane of Wrath
Plane of Envy
Plane of Pride
The Void
Kill Inarius to open a Portal to the Black Abyss.
Lore
The Void, a bleak realm where sorrow beckons the virtuous.
This barren place of torment is bathed by a nefarious essence that nurtures the dark emptiness which serves as a blank canvas on which the soul casts a foul shadow, extending far beyond one's own understanding...
Every impurity clinging to a visitor's spirit will take form, and in this struggle he shall face wicked beings whose existence is entwined with his own.
Two powerful presences are resonating in this realm: Inarius' and Lilith's.
The former has reached for the black void to regain mastery over his might while unhindered by the confines of Hell, the latter instead was banished here by Inarius himself in the forgotten past.
Regretfully you will have to face them both, as an obstacle between their eternal damnation and their wicked ambitions.
Be aware that in this cursed journey you will have to overcome your own manifested darkness.
Strategy
After the clash with Inarius' manifestation, his released malevolence has exposed a pathway leading unmistakably to the Void itself.
Your 7 deadly sins will stand before you, each expressing its own nature. Once you have managed to beat them all, cube their remnants to purify them and craft the Ring of Virtue. Reach deeper in the fabric of this dimension and use the "Scream of Trag'Oul" to shatter the Ancestral Seal in the last plane of the Void and prepare for the final battle.
Bosses
The rebellius progenitors of humanity, Inarius and Lilith, will manifest in your presence. Unburdened by the chains of Hell,
Inarius is now clad in arcane dark magic boosting an immunity to all damages.
The only way to temporarily break his defense is to kite him into Lilith's wicked Blood Ritual, allowing for a brief critical opening. Inarius casts powerful ice orbs which are a great threat to Lilith. When left untreated the orbs will explode into a massive spikestorm - you must prevent this by hitting them before they do. Brimming with power, both legendary entities will recklessly attack, you'll have to be strategic and turn the tide of battle in your favor.
Reward
Defeat Inarius on Hell difficulty to get Books of Kalan.
Required Level: 90
Keep in Inventory to Gain Bonus
+1 to All Skills
+(3 to 15) to Teleport
+25 to Life
+50 to Mana
10% chance to drop a trophy fragment on Hell difficulty.
Nephalem's Sacrifice
DIFFICULTY: EXTREME
Location
after the Edyrem's Path (Crystal Arch)
Find the portal within the Crystal Arch in the High Heavens to start the Edyrem's Path.
Lore
The corruption flowing across the Silver Spires has lastly reached the very heart of the High Heavens, the Crystal Arch.
The primordial structure, where angels harmonize their essences with its resonance to give birth to other seraphims, is now twisting and coiling while gushing out a profane symphony of terror.
Diablo's essence, enhanced by the corrupted Arch, is now echoing in Sanctuary as in Heaven and Hell, resonating with every soul that was once blemished by his terror.
The dreadful memories, engraved in the attuned spirits, are being unraveled to the vile Arch and molded to be reborn in the image of wicked past entities.
Ancient memories, such as those recorded in the Tomes of Kalan, are inscribed in the arcane forces permeating Sanctuary and are now seeds for Diablo's despicable creations.
The Crystal Arch, on the brink of collapse, strains to repel the impetuous thriving of the parasitic corruption. Its fragile balance cannot hold for long.
Strategy
As the legendary Edyrems did during the Sin War, you have to stride on their path and protect humanity. Emmpowered old foes are the roaming forged memories you'll have to face on your path to the final stage.
Once on the final stage you'll be confronted by Uldyssian himself. He casts a small wave of four magicbolts in your direction and huge intersecting Deathstrike stripes originating from his position (which is the intersecting point) and extending outward.
He also summons powerful but slow moving Edyrems that attack only when they're in melee range and seldom cast sacred armor on themselves.
It is best to keep moving around the arena as much as possible avoiding his Blink spell.
Reward
Defeat Uldyssian the Tainted on Hell difficulty to get Neutrality Pact.
Required Level: 90
Keep in Inventory to Gain Bonus
+(1 to 2) to All Skills
+(61 to 100)% Bonus to Summoned Edyrem Life
+(2 to 5) to Purify
10% chance to drop a trophy fragment on Hell difficulty.
Archbishop Lazarus
DIFFICULTY: EXTREME
LOCKDOWN: 15 seconds
Location
Genesis (Viz-jun)
Town Portals are disabled
Lore
There are many religions in Sanctuary. Although they all tell very different stories, loremasters agree that since most of them seem to be effective and enable their faithful to work miracles, there has to be a common truth between them. One particular
element found in most religions is the creation of the world by a God or other deity, whether it be Anu, the Earthfather and Skymother or even Tiarna Dulra. Some even believe that the world as we know it was shaped by an individual human on another plane,
one 'Archbishop Lazarus' with a calculation engine powered by lightning. According to this cult, when humanity complains too much about the difficult living conditions in Sanctuary and the scarcity of divine weaponry, he may send his avatar to the mortal plane
to deal with those who annoy him in person...
This quest is a tribute to Brother Laz, the original creator of Median.
Strategy
The Groupies are just your average frenzied fanbois with throwing knives and should not be too hard
to dispatch despite their tri-elemental attack. The boss, Archbishop Lazarus, is at a whole different
level. Do not stand still in his crosshairs or he will cast either Deathstrike or Singularity on
you and annihilate you. If you keep moving, he will attempt an offensive teleport, summon more minions
and may cast totems that kill you if you go near them. Do not destroy the totems: they will unleash
wild magic that renders you brittle as glass and heals Archbishop Lazarus and his Groupies. Using
his powers, Archbishop Lazarus is invulnerable to any damage and this time there is no
loophole or weakness. Use the Purify skill you acquired in Duncraig and keep hitting the power
tripping modmaker with it until he dies.
Reward
Defeat Archbishop Lazarus on Hell difficulty to get The Glorious Book of Median.
Required Level: 90
Keep in Inventory to Gain Bonus
+1 to All Skills
Adds 10-15 Damage
+(24 to 45)% Damage to Demons
Elemental Resists +(5 to 15)%
6% chance to drop a trophy fragment on Hell difficulty.
Bonus quest
To read the last chapter in the book, you need to obtain the Book of Cain and unlock its full contents. Then cube it with The Glorious Book of Median to complete it and to unleash it's full power:
This upgrade recipe adds the following bonuses:
+10 to all Attributes
+5% to Experience Gained
Congratulations!
DIFFICULTY: IMPOSSIBLE

Uileloscadh Mór
REQUIRED LEVEL: 135
DIFFICULTY: IMPOSSIBLE
LOCKDOWN: 15 minutes
Location
Scosglen
Lore
The gates of Sescheron, thought to be impregnable, thought capable of outlasting time itself, had guarded the path to the Worldstone for eons; but they've been ripped out by Destruction incarnate. In the ruined city, from profane rites and the blood of the defenders, a new evil was birthed, obliterating the virtuous Sescheron. The destroyer was then chosen to oversee the ranks of Baal's army and now ravages the lands of Scosglen searching for a hidden artifact to eradicate everything in his path. Look for hints in the forest and unveil the buried secret.
Find Baal's emissary and slay him, lest all humanity suffer greatly.
Reward
Defeat Sescheron's Destroyer on Hell difficulty to get the Dulra Fruit.
Herald of the End
DIFFICULTY: IMPOSSIBLE
LOCKDOWN: 13 minutes
Location
Edge of Nothingness (cannot open a Town Portal in the corridor)
Defeat Baal on the Hell difficulty to chance upon a mystery item. Solve its riddle, and gain access to the Edge of Nothingness.
Lore
The Eternal Conflict between the High Heavens and the Burning Hells has been raging from times immemorial. Angel fighting demon. Demon fighting angel. On, and on, and on... with no end in sight. The demon Lilith captured an angel, Inarius, and to her surprise, she discovered that they both grew tired of the Eternal Conflict. They decided to use the powers of the Worldstone to create Sanctuary, a world apart from the struggles of the everlasting war. They used the Worldstone to hide it from both sides of the conflict, but both sides soon discovered it, and tried to use it to their gain. The Burning Hells invaded Sanctuary, headed by the three Prime Evils, but were faced by a group of heroes, defending their home realm. The prime evils were defeated by mere mortals, but not before Baal could corrupt the Worldstone, trying to bind Sanctuary to the Burning Hells. The archangel Tyrael destroyed the Worldstone to prevent that, but in doing so, he also destroyed what was hiding the Sanctuary from the Heavens, Hell...
...and the worlds beyond the bounds of the known. Then, a foolish hero, in search of glory, to defeat evil, played with the unknown forces of the shards of the destroyed Worldstone, and through the gates of oblivion, from the Edge of Nothingness, stepped in a Herald of the End.
Strategy
Samael, Herald of the End, has powers beyond this realm. As an elder being, he has powerful direct attacks and latent powers. He casts a pentagram that renders everything asunder, except at its very center, and a dark energy orb which bombards the area with bone spears. If you survive, he will teleport to you causing a delayed flaming nova. Of course, he also has a powerful aura that reduces the powers of puny mortals in his presence, deals damage, and makes energy fields randomly appear and detonate after a short time. As if these horrors were not enough, he also has his minions from the beyond, which are ethereal and cannot be harmed, shooting bolts at you. And he will occasionally cast a pillar of flames to fall on you. Good luck, mortal, may you die a painful death for bringing the end upon us all!
Reward
If the stars of the all known realms align, and you defeat Samael on Hell difficulty, you will find that his blood holds immense powers. It would be wise to gather it in a Vial of Elder Blood. You will also gain one of a few elder items he brought with him.
To unleash true powers of the Vial of Elder Blood, you need to cube it with some powerful items:
Required Level: 90
Keep in Inventory to Gain Bonus
-5% to Enemy Elemental Resistances
Maximum Life +3%
Maximum Mana +(6 to 10)%
+50 Life after each Kill
+(5 to 25)% to Experience Gained
Transmute with a Nephalem Dimensional Key
with unlocked Dimensional Alchemy
and a Greater Signet of Learning to open
a portal to the Heart of Darkness
To unleash true powers of the Maleficence, Desolation, Despondence, or the Celestial Sigil, you need to cube them with some powerful items:
Amulet
Required Level: 125
Item Level: 110
Level 20 Warp Field Aura
1% Chance to cast level 50 Bloodlust on Death Blow
+(2 to 4) to All Skills
+20% to Spell Damage
5% Chance of Crushing Blow
5% Deadly Strike
Lightning Resist -100%
Voidsworn Bow
Two-Hand Damage: 70 to 79
Required Level: 125
Item Level: 110
Adds 4000 - 5000 Magic Damage
5% Chance to cast level 60 Dark Power on Kill
1% Chance to cast level 21 Lifeblood on Striking
+1 to Ultimate Chaos
Lightning Resist -100%
Physical Resist (15 to 25)%
100% Magic Find
Voidforged Staff
Two-Hand Damage: 13 to 16
Required Level: 125
Item Level: 110
Nearby enemies lose 10% Magic and Elemental resistances
+30% to Spell Damage
+1 to Vindicate
+20 to Voidstar
+(600 to 1000) to Life
Lightning Resist -100%
Tyrannical Blade
One-Hand Damage: 399 to 450
Required Level: 125
Item Level: 110
Dexterity Damage Bonus: (0.13 per Dexterity)%
Strength Damage Bonus: (0.14 per Strength)%
1% Chance to cast level 20 Orb of Annihilation on Striking
+200% Enhanced Damage
+50 to Harbinger
Lightning Resist -100%
(1 to 5)% Chance to Avoid Damage
+3% to Experience Gained
Bonus quest
Defeat the Samael between minutes 11 and 12 of entering, without dying. Transmute the upgraded charm to add extra stats. The charm becomes bound to your character class. You also have a 20% chance of gaining a glorious veneer.
This upgrade recipe adds the following bonuses:
Champion of Sanctuary
-5% to Enemy Elemental Resistances
Maximum Mana 5%
Deimoss
REQUIRED LEVEL: 135
DIFFICULTY: IMPOSSIBLE
LOCKDOWN: 8 minutes (entrance 10 minutes)
Location
Dimensional Plane (Act 5: Dimensional Labyrinth 10)
Lore
At the source point of the inconceivable paths not meant for mortals to tread, Deimoss the Fleshweaver awaits. With unnameable powers at her fingetips she aims to align her own world with that of Sanctuary, paving the way for an invasion of all the evils it holds.
The accursed scheme casts a dark shroud over the future of men and must be stopped at any cost.
Strategy
At the end of the Dimensional Labyrinth is the strongest force of these rifts, Deimoss the Fleshweaver. Unleashing her Councillors and
their Gestating Growths with Purify strengthens the power of the Dimensional Key that Deimoss drops upon defeat. To get the
most powerful Dimensional Key, defeat Deimoss as all of her minions watch.
Depending on how many Gestating Growths are present, defeating Deimoss and then cubing the Dimensional Key yields various bonuses.
This upgrade recipe adds the following bonuses:
With 0 Gestating Growths remaining:
5% Deadly Strike100-200 Fire, Cold, and Lightning Damage
5% to Spell Focus
5% to Maximum Life and Mana
The quests below require the completion of the Trial of the Nephalem
With 3 Gestating Growths remaining, this completes the Occult Smithing quest, granting:
The Occult Effigy upgrade recipe. Trasnmute two identical Effigies to receive a higher tier. Unlimited uses.
With 5 Gestating Growths remaining, this completes the Dimensional Alchemy quest, granting:
The Relic crafting recipe. Transmute a Depleted Riftstone (6) to receive a random relic. 5 charges.
Otherwise, Deimoss yields a less powerful version of the Key, with the power reducing further the less of them are present for the fight. You unleash them by using Purify.